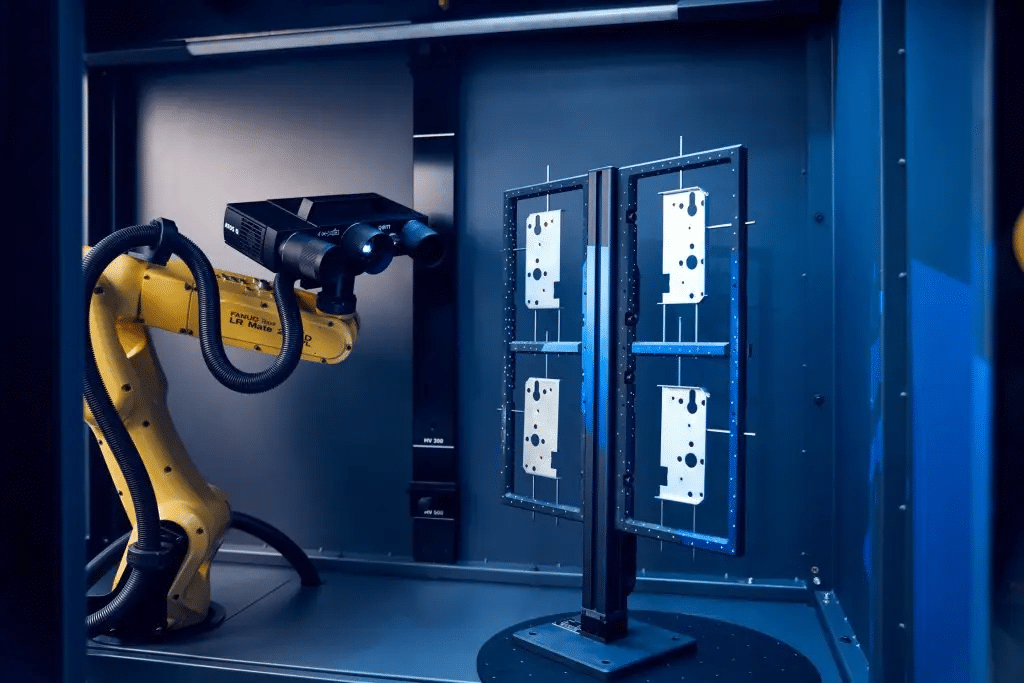
The inspection of high-precision stands used to transfer vehicle driver cabins to other production facilities, the ability to submit real-time deviation reports to customers, and the estimation of costs for multiple repair solutions leading to better decision-making—all of these became possible due to the presence of an automated 3D measurement system.

Challenge: The method of safely and automatically transferring vehicle driver cabins from one production facility to another.
When the driver cabin (operator’s compartment) and chassis are manufactured in separate factories, manufacturers use stands (skids that secure the driver cabin with 4 points) for their transportation. Therefore, both the driver cabin and the stands require high precision to safely hold and maintain the cabin. The fixed positions must be appropriately set, and the dimensions must be accurate, as these factors influence the quality of the vehicle.
If stands are moved by human hands using forklifts in the factory and are susceptible to damage, how can the manufacturer ensure specifications are met for all of them?
To minimize the rate of discarding and maximize productivity, this service company conducts inspections of each stand for every loop. If an issue is detected, the faulty stand that could affect the production workflow is diverted by an automated line and replaced with another. When defects are found, repairs are also necessary. Unless the stand is determined to pass the measurements by the inspection solution, the mechanism keeps the stands within the factory.
Results when using high-precision stand measurement inspection fixtures:
For instance, when conducting inspections using a manual inspection station with inspection fixtures with a tolerance of ±2 mm, the skids only need to fit within this fixture. If they do not fit, they are considered out of tolerance. However, the extent of the deviation is not known. It is impossible to accurately determine what the actual problem is or which aspect is faulty. Additionally, this measurement method cannot reveal the actual positions of the four crucial fixed locations.
How can companies providing inspection and repair services ensure 100% transparency to their customers?
When performing repairs for issues identified in their own inspections at a cost, there could be a potential conflict of interest where the more defects there are, the more repairs need to be carried out. The service company might be questioned about the reasons for the repairs. Moreover, customers might inquire whether the damage is severe enough to necessitate repairs or if repairs are truly needed. Therefore, there’s no better way than to provide real-time measurement results and show where repairs have been done. It’s necessary to enable customers to access quality information about their products. By leveraging automated quality management solutions, all levels of transparency can be ensured.
Solution: High-precision, high-speed, and versatile user-friendly automated 3D measurement system.
Precision: By leveraging automated quality management solutions, service companies can enhance measurement quality without being affected by environmental instability or user proficiency. It is possible to achieve high accuracy, repeatability, and more accurate results.
Ease of Use: With automated measurement, operators no longer need to manually record data, reducing errors caused by lack of attention or fatigue. The deviation reports are stored in a cloud service for real-time customer access through the digital document creation feature. With plug-and-play devices and a user-friendly interface, operators can quickly perform reliable measurements.
Versatility: In addition to metrology-grade accuracy and ease of operation, 3D scanning technology can be applied to various types of skid measurements with different sizes and shapes. This makes it more versatile compared to other commercial solutions. In essence, if it’s within the robot’s scope, it can be scanned.
Speed: With high measurement rate capability and easy setup, results can be obtained in just a few minutes after scanning. The time for data acquisition and analysis is significantly reduced. This allows industrial service teams to shorten lead times and reduce inspection costs billed to customers.
Key Features: With automated 3D scanning, you can optimize the inspection of high-precision stands and enable better decision-making by comparing multiple repair solutions.
Understanding Deviations: Service companies can not only identify deviations but also assess the severity of those deviations, allowing for appropriate repairs or corrections.
Improved Inspection Accuracy: By implementing automated quality management solutions, service companies can efficiently and reliably perform highly accurate measurements required for precision parts. Real-time follow-ups and measurement data available 24/7 can be provided to customers.
100% Transparency: Deviation reports are stored in a cloud service, allowing customers to review the reports in real time. Customers can understand not only the measurement results but also which areas are under repair. Customers can access real-time quality information about their products.
Better Decision-Making: If the skids do not match the CAD drawings, service companies review inspection reports for the entire lot. The decision on repairs varies based on whether a few faulty skids are present or if there is a deviation of ±3 mm in one direction across a batch of 2000 skids. The decisions could range from estimating the cost of repairing all skids to evaluating whether the assembly line can accommodate the deviation. Essentially, having individual data for all skids allows for estimating the costs of multiple solutions and making better decisions.