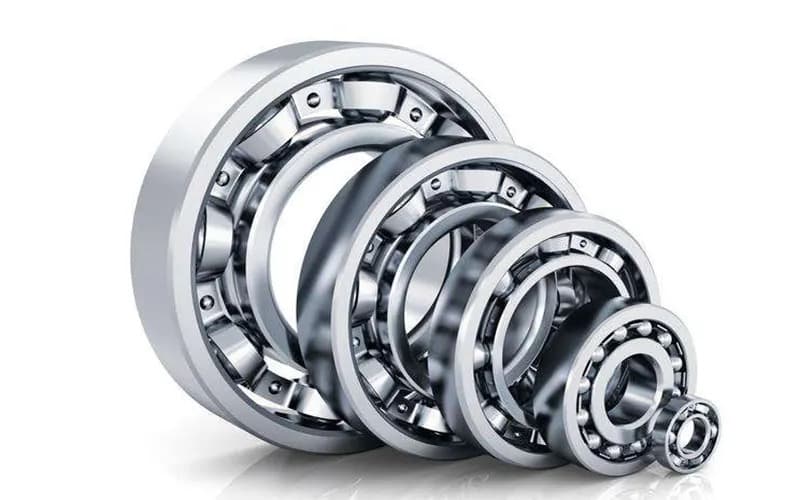
Bearings are indispensable parts for machine manufacturing that are built into all kinds of products, from home appliances to automobiles. It is also called “rice in the machine industry”.
In this article, we will explain the role and type of bearings and possible defects. If you want to get a better understanding of bearings, take a look at the end.

The Role of Bearings
Bearings are parts that rotate the shaft inside the machine smoothly. It is also called a “bearing” because it receives the rotation of the shaft.
The basic structure of a bearing is an inner ring, a ball, and an outer ring. When the outer ring is fixed to the machine and the shaft is fitted inside the inner ring, the shaft rotates smoothly and stably. The role of this rotation is to bring the friction between the parts close to 0 (zero).
Bearings are used in many places and are also incorporated into products that are indispensable to our lives, such as wind power generators, airplanes, automobiles, trains, and personal computers.
For example, automobiles use about 100 to 150 bearings. Without bearings, the wheels and transmission will rattle and the car will not run smoothly.
In addition, bearings are indispensable for the sophistication of machines. It can be said that it is a part that also affects the energy saving of the product. Without bearings, friction increases and energy consumption increases.
Sometimes used in harsh environments, bearings can be said to be a force behind the scenes.
By the way, if we look back at the history of bearings, it goes back to BC. At that time, when building a huge building, it was necessary to carry huge stones, but of course there were no cranes.
So they lined up cylindrical timber on the ground and placed stones on it to carry it. This became the starting point, and since then, bearings utilizing this action have become popular throughout the long history from ancient times to modern times. And now it is used in various products.
Main Quality Inspections of Bearings and Defects That Can Be Found
Bearing quality inspections include vibration inspection, visual inspection, and dimensional inspection. We will explain the contents of each inspection and the defects that can be found.
Vibration inspection
Vibration inspection is an inspection to check the quality by measuring the vibration when the bearing is rotating. Since the unit of vibration when the bearing is rotating is called “Anderon”, the vibration test is sometimes called “Anderon meter”.
Vibration inspection can detect swells of inner and outer rings, swells of rolling elements such as balls, scratches on cages and seals, and adhesion of foreign matter. The roughness of the machined surface can also be detected for the inner ring, outer ring, and rolling element. In other words, you can inspect the overall quality by performing a vibration inspection.
Visual inspection
Visual inspection inspects the appearance of finished products and assembled products. Inspections are mainly performed using a camera to check the bearings for rust, corrosion, scratches, dents, foreign matter, dirt, air holes, and other defects.
In particular, visual inspection using a camera is characterized by being able to instantly determine various defects.
By the way, the image taken by the camera is processed in three steps: preprocessing, measurement processing, and judgment / output. Preprocessing reduces noise in the captured image to make it easier to inspect. The measurement process measures the dimensions of the image processed in the pre-processing. In the judgment / output, pass / fail is judged by comparing the tolerance set in the image processing device with the measurement result.
See also the following articles for visual inspection using image recognition.
What is the mechanism of visual inspection using images and the range that can be detected? Introducing recommended systems
In dimensional inspection, displacement sensors are used to inspect dimensions such as outer diameter, inner diameter, width, and track groove of finished products and assembled products. A displacement sensor is a sensor that measures the amount of movement when an object moves to a specified position, but it is also used to measure not only the amount of movement but also the dimensions. There are various types of displacement sensors, and the most suitable equipment is selected according to the application and required accuracy.
Bearing Defects Found by Quality Inspection
We recommend installing an inspection device for bearing inspection. By introducing inspection equipment, it is possible to improve inspection accuracy and quality and reduce inspection costs.
As for the accuracy of bearings, dimensional tolerances are set by international standards, and accuracy in micron units is required. Therefore, there are limits to human-based inspection methods such as visual inspection.
In addition, inspection can be automated by introducing inspection equipment. The accuracy of inspections by inspectors tends to vary depending on individual experience and skills, and the inspection system may change depending on the physical condition of the inspectors.
When inspections are automated, inspection accuracy can be improved and stabilized. In addition, it will lead to the elimination of labor shortages that plague the manufacturing industry and the reduction of labor costs.