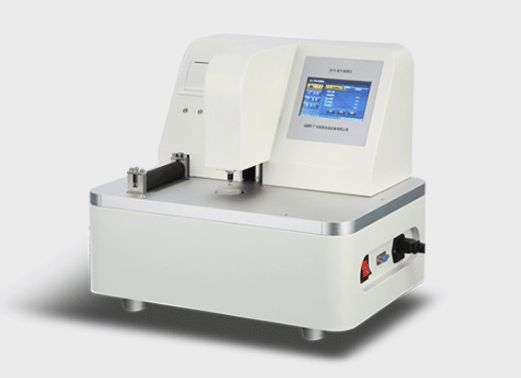
The film thickness gauge is applicable to a wide range of industries. It can measure the thickness of plastic, metal, coating materials and other materials. It is a measuring tool for designing and manufacturing objects, helping us judge whether the quality of objects is qualified, and also helping us save the cost of object design and manufacturing. It can be said that the purchase of high-precision full-automatic film thickness gauge improves the quality of object design and manufacturing.

Full Automatic Film Thickness Gauge Overview
– The full-automatic film thickness gauge adopts a unique mechanical measurement method. The measured contact area is more stable, fast and responsive than that of the ordinary film thickness gauge.
– The inductors used in the full-automatic film thickness gauge are all imported inductors, and the thickness measurement resolution is beyond that of ordinary film thickness gauges, which ensures the stability and accuracy of high-precision measurement test results.
– The full-automatic thickness gauge adopts screen display operation to display test data and results. It does not require operators to have too much experience, as long as they understand the operation of the film thickness gauge, they can use it.
– The thin film thickness gauge is equipped with a computer communication interface, which not only makes it convenient for us to select and consult the results of measurement experiments, but also enables data storage and printing. It has modern electronic information functions. As we all know, modern life and work are completely inseparable from computers, and the thickness gauge connected to computers can also summarize and count the data obtained from experiments in the form of graphs or lists through operation, It is convenient for us to investigate and compare. This is the advantage of using instruments and equipment through computers. The full automatic thickness gauge is truly accessible from the use of data.
Although the full-automatic thickness gauge is upgraded from the ordinary film thickness gauge, it does not have the shortcomings of the ordinary film thickness gauge at all, and it amplifies the advantages of the ordinary film thickness gauge, so that the experimental measurement data we obtained has both traditional stability and modern electronic information, and can be used as a reference for experimental measurement.
Attention shall be paid to the following points in terms of accuracy of test detection:
1. The surface of the tested object is covered
Before thickness measurement, the surface of the object to be measured should be cleaned, such as dust, stains or some attachments, which will affect the accuracy of the measurement results.
2. The surface of the tested object is too rough
If the surface of the object to be measured is too rough, the accuracy of the measurement results will also be affected, and in serious cases, the machine will not read. Therefore, the surface of the object to be measured should be as smooth and clean as possible before measurement.
3. Rough machined surface
Some lathe surfaces will have some slight grooves, which will also make the measurement results inaccurate. For specific treatment methods, refer to the second one.
4. Cylindrical surface
If the measured objects are cylindrical materials, such as oil drums, pipes, etc., it is necessary to correctly select the angle between the measured materials and the equipment interlayer plate, so as to obtain more accurate results.
Different tested objects have different angles for the equipment partition board and the tested material. For example, for pipes with relatively small diameters, the method of parallel or vertical pipe axes can be used; If it is a pipe with a larger diameter, the vertical method can only be selected.
5. Conform to the shape
If the object to be measured is a composite shape, such as the elbow of a cylindrical material, the method described above can still be used. The difference is that a second measurement is required. In the measurement, two values should be measured respectively when the axis of the spacer plate and the object to be measured is parallel and vertical, and the smaller one should be taken as the final measurement thickness.
6. Nonparallel surface
In order to obtain a relatively stable and accurate thickness measurement result, the measured surface must be parallel or coaxial with the other surface of the measured material, otherwise a relatively large measurement error will be caused or the instrument will not read at all.