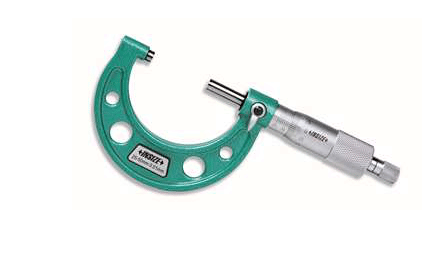
In life and work, mechanical measurement is inseparable from rulers. Industrial rulers include angle rulers, calipers and micrometers. Among them, the micrometer has the highest accuracy, and its use also requires our careful operation.
The structure of the outside micrometer is composed of a fixed ruler frame, anvil, micrometer screw, fixed sleeve, differential cylinder, force measuring device, locking device, etc. There is a horizontal line on the fixed sleeve, a column of scale lines with a spacing of 1 mm on the line and below the line, and the upper scale line is just between the two adjacent scale lines below. Divide the circumference 50 equally. These horizontal lines are the scale lines on the differential cylinder, which can move. From the reading mode, there are three types of outside micrometers commonly used: ordinary type, band representation and electronic digital display.

Measuring Principle of The Outside Micrometer
The measuring principle of the outside micrometer is spiral movement. When the differential cylinder rotates on the rotating shaft for one circle, the measuring screw moves forward or backward by one pitch. The value is 0.5 mm. In this way, when the differential cylinder rotates for one graduation, it rotates for 1/50 circle, and the screw moves 1/50 along the axis × 0.5 mm=0.01 mm, so the micrometer can accurately read the value of 0.01 mm.
Method of Factory Quality Inspection
After measuring the data, the staff manually records the data on paper, or two people work together, one measuring and the other recording. When analyzing the data subsequently, the operator enters the recorded data into the computer. This method results in low speed and easy to remember wrongly.
The Main Measurement Target From The Outside Micrometer
To achieve paperless measurement, improve accuracy and detection efficiency, and timely remind the nonconforming products that exceed the specification. We can know that the application of the external micrometer can solve the problems in the measurement of the above factories.
Reading Method of Outside Micrometer
Take the reference line of the differential sleeve as the reference to read the scale value of the left fixed sleeve, and then use the reference line of the fixed sleeve to read the scale aligned with the reference line of the differential sleeve. It is the differential sleeve scale value, and the measured value is the sum of the fixed sleeve scale value and the differential sleeve scale value.
The flexible use of micrometers can help enterprises to control errors at the beginning of production, make subsequent production more accurate, and thus improve the quality of products. The precision measurement performance of micrometers can help us find errors that cannot be observed by the naked eye, and help users understand the specific specifications of mechanical parts. It is a small range amplification machine.