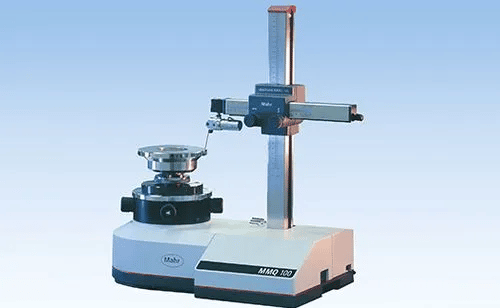
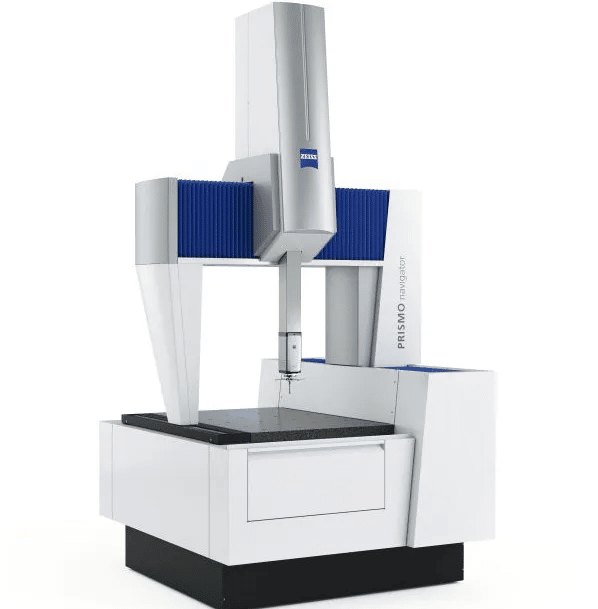
Are you measuring geometric tolerances efficiently? There are two types of measuring machines that can handle most geometric tolerances: CMMs and roundness measuring machines. Many people use CMMs to measure all geometric tolerances.
Although CMMs can handle many geometric tolerances, it may not be efficient. CMMs are measuring machines that first measure and then analyze later.
Therefore, if a lot of data is taken, various analyses can be performed later. On the other hand, it is easy to take data that is not necessary because it may be analyzed later.
With a roundness measuring instrument, the items to be measured are determined at the beginning, so only necessary data is acquired. Therefore, if the measurement items are determined, measurement can be performed more efficiently than with CMMs.
This article explains the advantages and disadvantages of measuring geometric tolerances with CMMs and roundness measuring machines.
Advantages & Disadvantages of CMMs
There are many types of CMMs, including gate-type, arm-type, camera-type, and laser trackers. Each type has a different object to be measured, but the results that can be measured are the same: the X, Y, and Z coordinates of the measurement point are acquired. Using those coordinates, it analyzes lines, surfaces, and centers and calculates their distances and dimensions. One of its uses is to analyze geometric tolerances.

Here we will introduce the advantages and disadvantages of measuring geometric tolerances on CMMs.
Advantages of Measuring Geometric Tolerances on CMM
Measuring geometric tolerances without spending a lot of money is possible through the successful use of surface plates, dial gauges, V-blocks, etc.
However, this method determines the reference plane by the setting. Since geometric tolerances are to measure the difference from a reference, the setting of the reference plane is very important.
Therefore, setting takes time, and only one geometric tolerance can be measured at a time. Also, the accuracy is not very good. Therefore, there are many advantages to using a CMM.
Reduced measurement time
The use of CMMs can significantly reduce the time required for setting up the measurement. This is because the measured data can be used to create reference surfaces, reference lines, and reference points. In other words, setting has little impact on accuracy, so you can save time by not having to worry about setting.
Automatic measurement is possible
Some models are capable of automatic measurement if programmed. This can lead to a reduction in man-hours for measurement.
Can be analyzed later
CMMs are good at taking a lot of data and analyzing it later. By saving a lot of data, it is also possible to analyze geometric tolerances that you have not paid attention to before when a defect occurs.
Disadvantages of Measuring Geometric Tolerances on CMMs
Although CMMs have many advantages, they also have some disadvantages.
Costly
The biggest disadvantage is that they are expensive to install. The more sophisticated the model and the larger the object to be measured, the more expensive it is. Some of the most expensive models cost tens to hundreds of millions of yen. In addition, periodic maintenance and calibration to maintain accuracy also cost money.
Requires installation space
The commonly used gantry-type CMMs need to be mounted on the object to be measured. Therefore, the surface plate on which the object is placed becomes large, and a large space is required to set up the measuring machine. In addition, a constant-temperature room is required because a temperature environment must also be maintained for accurate measurement.
There are some things that cannot be measured
It may be a matter of course, but with contact-type probes, measurement is not possible in places where the probe cannot make contact. Deep or narrow holes are difficult to measure.
Non-contact type cannot measure places where light cannot reach. It is also difficult to measure objects that are black and difficult to reflect, and objects that do not scatter light, such as mirror surfaces.
Accuracy is not so good
Even with a gantry-type contact probe, which is the most accurate CMM, the measurement accuracy is about 1 μm. For non-contact probes, the accuracy is about 10 μm. If the accuracy required for geometric tolerances is only a few micrometers, it is better to think that CMMs cannot be used.
Measuring with precision requires skill
To use a CMM with good accuracy, you need to understand the tricks of the trade. There are many tricks, such as which direction to measure from, how much force to use to make contact, and where to base the analysis.
Therefore, keep in mind that it takes time to educate yourself on how to measure accurately.
Advantages & Disadvantages Of Roundness Measuring Machines
Many people think that roundness measuring machines can only measure roundness and cylindricity. However, some models can measure many geometric tolerances such as straightness, flatness, parallelism, squareness, coaxiality, concentricity, circumferential runout, and total runout. Therefore, there are many cases where it is better to use a roundness measuring machine than a CMM.

Here we introduce the advantages and disadvantages of using a roundness measuring machine to measure geometric tolerances.
Advantages Of Measuring Geometric Tolerances On Roundness Measuring Machine
The advantages of using a roundness measuring machine to measure geometric tolerances are as follows
Inexpensive to install
Compared to CMMs, roundness measuring machines are inexpensive to install. The cheapest one can be purchased for several million yen.
High accuracy
The accuracy of roundness measuring machines is one order of magnitude higher than that of CMMs, ranging from 10 to 100 nm. Therefore, accuracy is not a problem for most geometric tolerance measurements.
Contact type also has a large number of data points
Roundness measuring machines can take very detailed data, about 10,000 points per round. This allows for more detailed analysis and is less susceptible to noise.
Automatic measurement programs can be easily created
Because CMMs can do so many things, their settings tend to be complex. Many settings are required for both measurement and analysis.
Roundness measuring machines require less time and effort to set up, because the best settings can be made by selecting the type of geometric tolerance.
Disadvantages of Measuring Geometric Tolerances on Roundness Measuring Instrument
The disadvantages of using a roundness measuring machine to measure geometric tolerances are as follows
Large objects cannot be measured
Objects that cannot be placed on the measuring machine cannot be measured. Roundness measuring machines come in two types: the table rotation type, in which the object to be measured rotates, and the detector rotation type, in which the object to be measured is fixed. When measuring large objects such as engines with a roundness measuring instrument, a detector-rotating type roundness measuring instrument is used. However, even with the rotary detector type roundness measuring machines, the size limit is a few hundred mm square or smaller.
Dimensional measurements are not possible
Because roundness measuring machines specialize in measuring a small area with high accuracy, they are basically incapable of taking dimensional measurements. The reason I say “basically” is that comparative measurement is possible. For example, if you have a reference of 10.000 mm in diameter, you can measure 9.5 to 10.5 mm in diameter in comparison with it.
Summary
To measure geometric tolerances accurately and efficiently, either a CMM or a roundness measuring machine is used.
The main advantage of CMMs is the reduction of man-hours, but the biggest disadvantage is their high cost. Roundness measuring machines, on the other hand, are less costly and can measure accurately, but they cannot measure large objects or dimensions.
When measuring geometric tolerances, some people use CMMs for the time being, but it is more efficient to use different types of CMMs for different purposes. For high precision measurements, roundness measuring machines should also be used.